
How to Host a Friendsgiving Dinner
Here at Lovely Events + Planning, we love a good celebration. We are always looking for a reason to party!! This year, we were able to help put together a “Friendsgiving” celebration. For those that don’t know what Friendsgiving is, it’s exactly like it sounds- Thanksgiving dinner, but with your friends!!
This was actually the 5th year we put on a Friendsgiving event, so we kind of feel like we have mastered it at this point. So, we are going to walk you through exactly how we make a Friendsgiving celebration happen.. Or you could just hire us and we will take care of all of this for you!!
Step 1
Establish a Guest List
The first thing to do is to make a list of who to invite. Although it can be hard to narrow down a list, we believe that less is more for Friendsgiving. There are many benefits to keeping the guest count low for an event like this. Mainly, this allows the budget to go a little further so you can really focus on the details that go into making each person feel special!
Remember, the more people that are invited, the more expensive this celebration will become. Our magic number for a Friendsgiving event is 12! Normally, you can seat around this many people with the tables and chairs you already have at your house. One way we help keep the guest count low is we have made this a girls only event. Not only will this help keep the budget manageable, but the guys don’t appreciate all of the fun details anyway!
Step 2
Decide on a Theme
Okay, now that I have preached all about your guest list, it is time for you to decide what you want the design of the event to be! You can go about deciding on the vision for your event in many different ways. Our two favorites:
1- See what you have around your house or shoved into a closet. Dust off your china that you never get to use! Anything in your house is fair game. Not only will it feel good to use those unutilized décor items, but it will be nice to save some money as well.
OR [if you are unable to find inspiration at home] :
2- Look on Pinterest for some table settings that catch your eye!
Either way, at bare minimum, you need to have a group of colors that you are working with. This will help make decisions moving forward and also keep everything looking streamlined.
Step 3
Mail Invitations
Yes, sending out snail mail for your Friendsgiving event is its very own step!! We believe details are so important, and this is at the top of our list for throwing a successful Friendsgiving event. Taking the time to mail out an invite to your event goes a long way over a text or a Facebook group. Not only does it set the tone for the event, but it makes guests feel important.
I don’t know about you, but I love getting something in the mail that isn’t a bill! Good news is, you can mail out invitations for under $10! That’s how little it cost us to mail out our twelve invitations this year. We wish we had taken a picture of them in their pink envelopes before mailing them out so you could see how cute they were.
Step 4
Create the Menu
The possibilities of the menu you choose to serve are endless. You can have each friend bring a different dish, which is most commonly done! You can serve traditional thanksgiving food, or cook something a little less traditional if you’d like. If you want to cook for everyone, you can make something simple like a big pot of spaghetti which will go a long way. We like to serve a Louisiana classic: gumbo!
Typically, the temperatures are cooling off and everyone already had or will have a traditional thanksgiving meal, so we have landed on gumbo as being something that pleases everyone. We also like to serve some type of signature drink for the event for everyone to sip on.
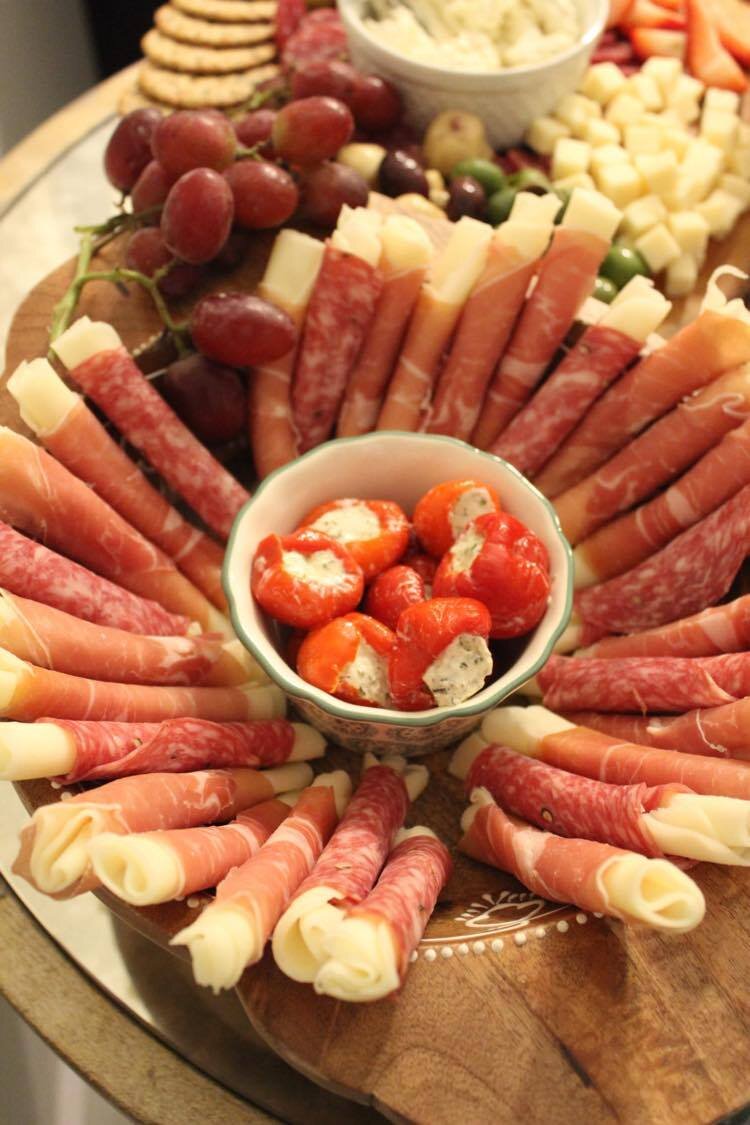
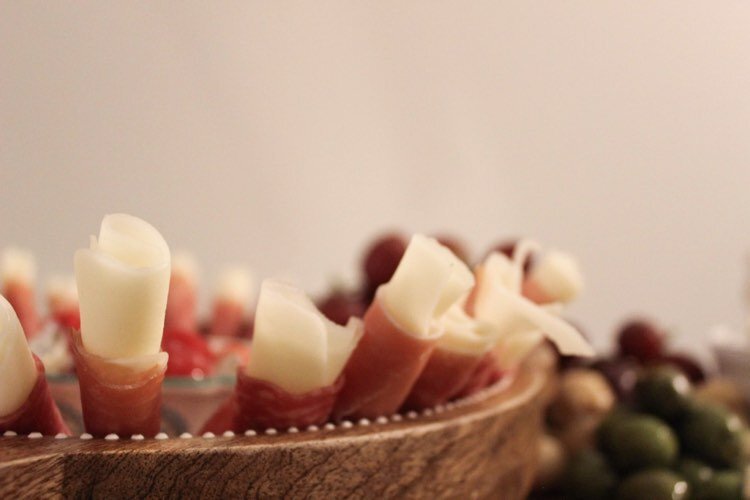
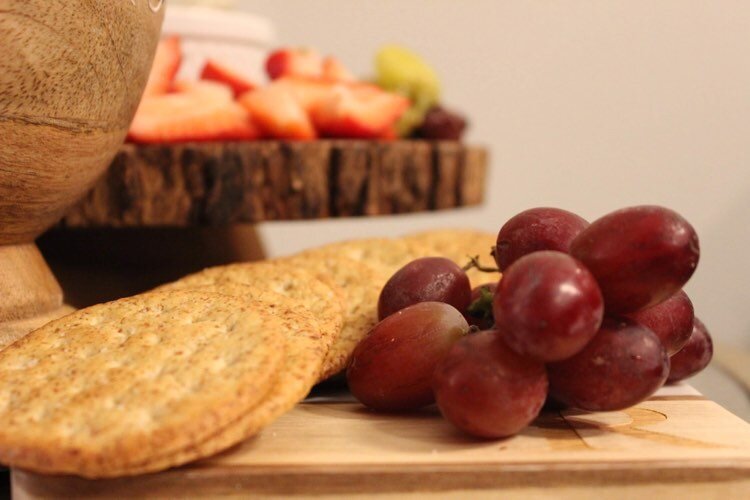
Having a charcuterie board or something for your guests to snack on before dinner while mingling is a guaranteed hit. There are companies that you can hire to put one together, or you can have fun with it like we did and put one together yourself! We got everything we needed from Costco and our local grocery store.
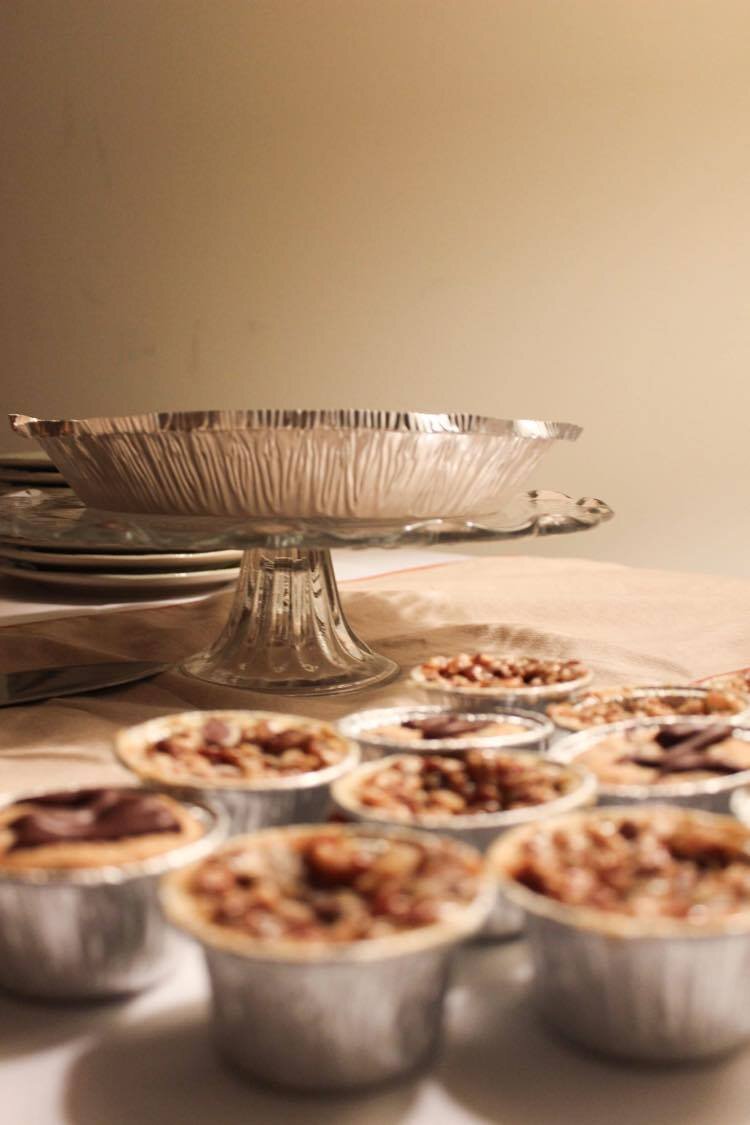
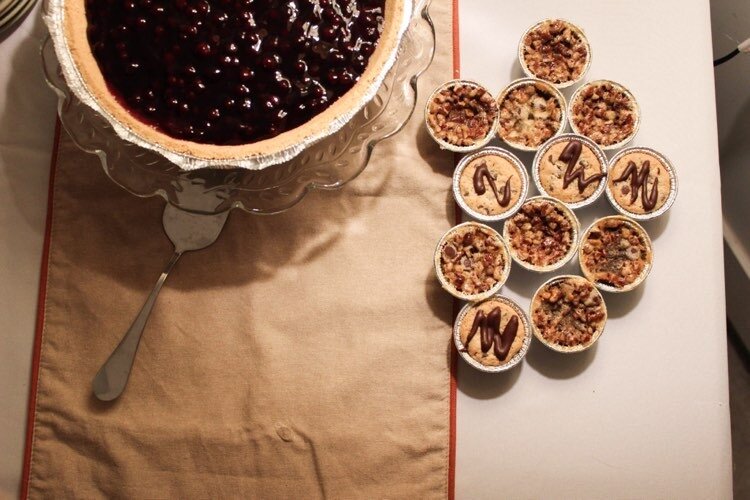
And of course, we like to serve some type of dessert! One year, each friend got to torch their own crème brulee! Another year, we decorated cookies. This year, we went with a variety of pies! You can never go wrong with a sweet treat to end the feast.
Step 5
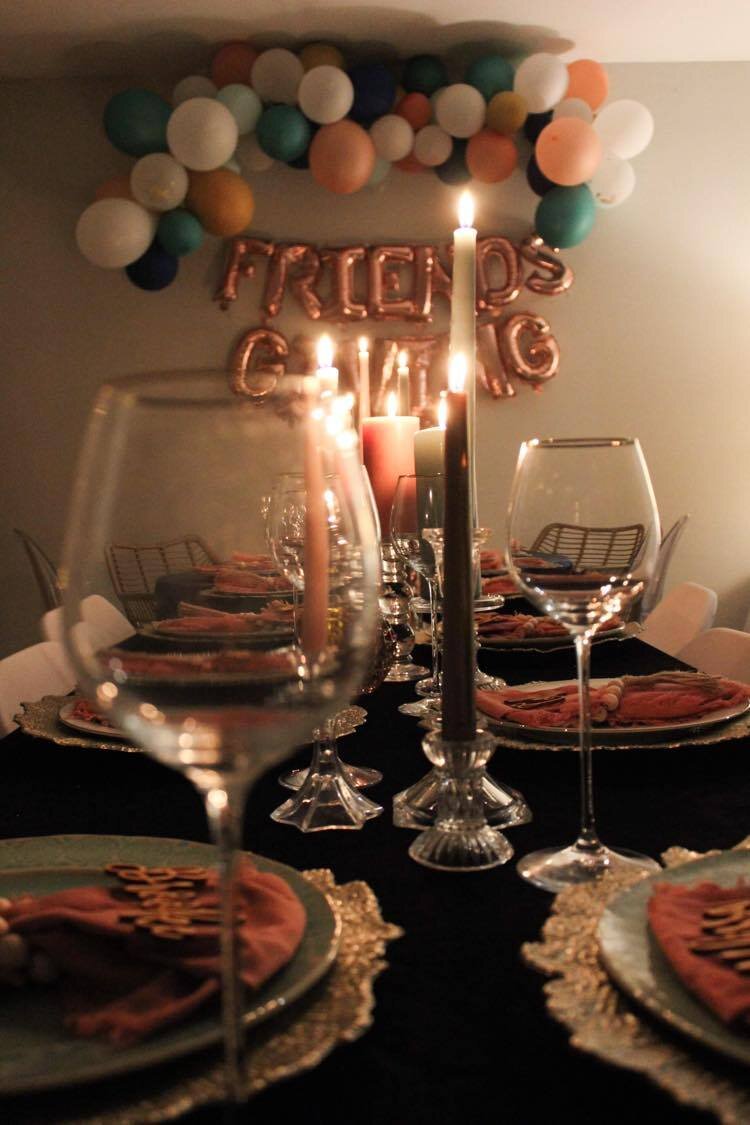
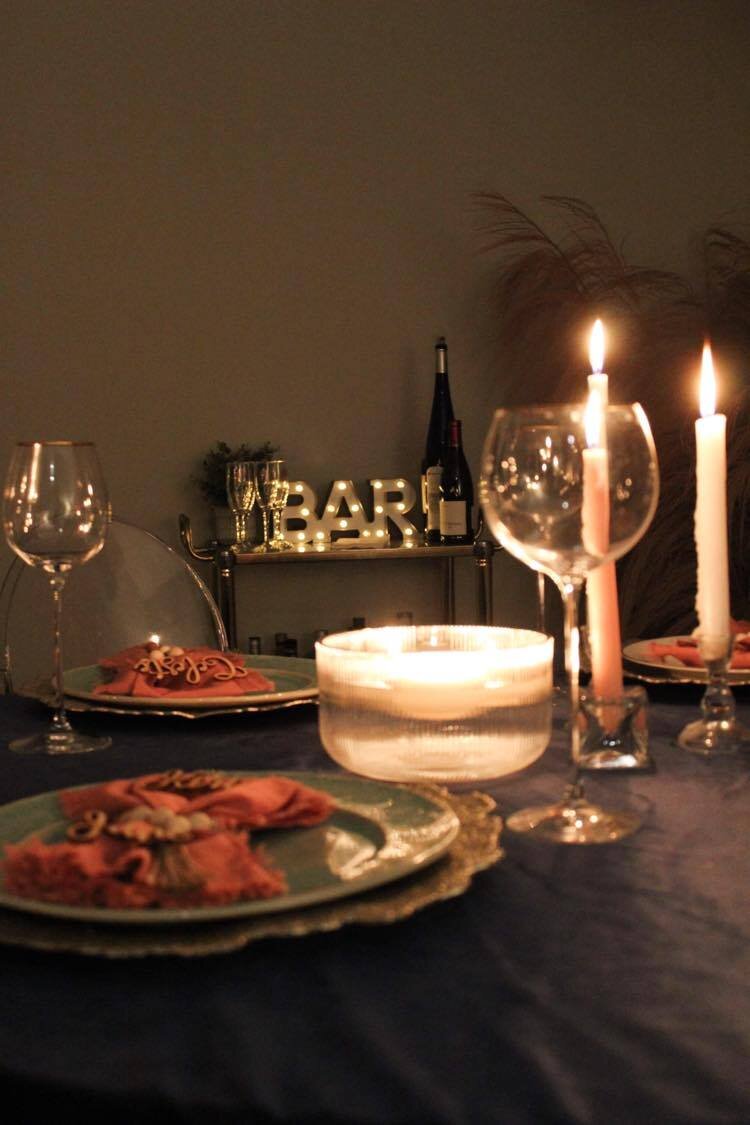
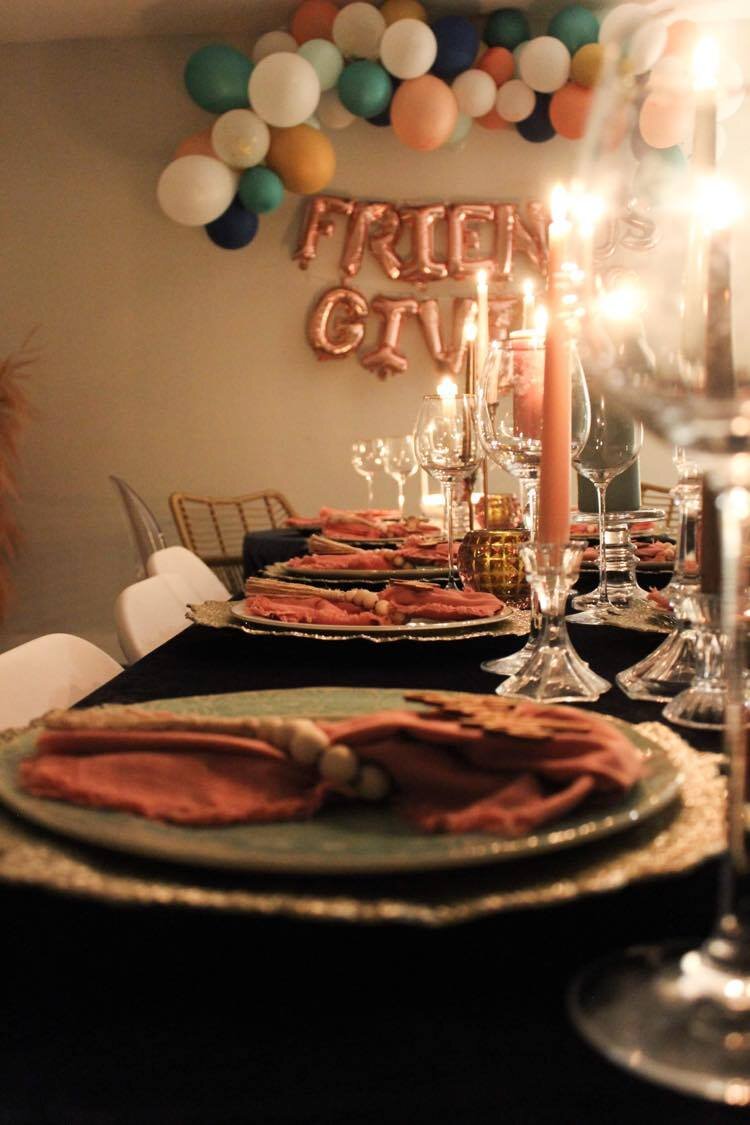
Set the Table
In the weeks leading up to the event, you should be gathering items you will need to set the table! We like to put everything together in one place so that we know what we are working with. Make a list of the items that might be missing so that you know what you need to purchase. Depending on your theme, these are some of the items you will need:
Table Cloth
Table Runner
Candle Sticks
Candles
Vases
Chargers
Plates
Bowls (depending on what you serve)
Utensils
Napkins
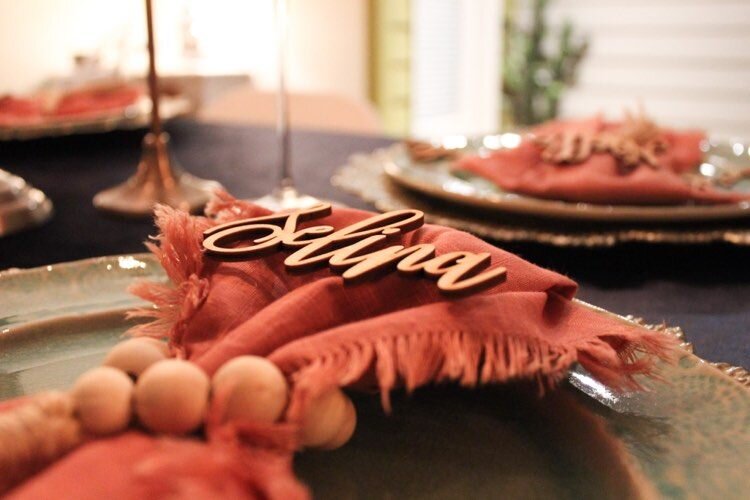
Napkin Rings
Flowers
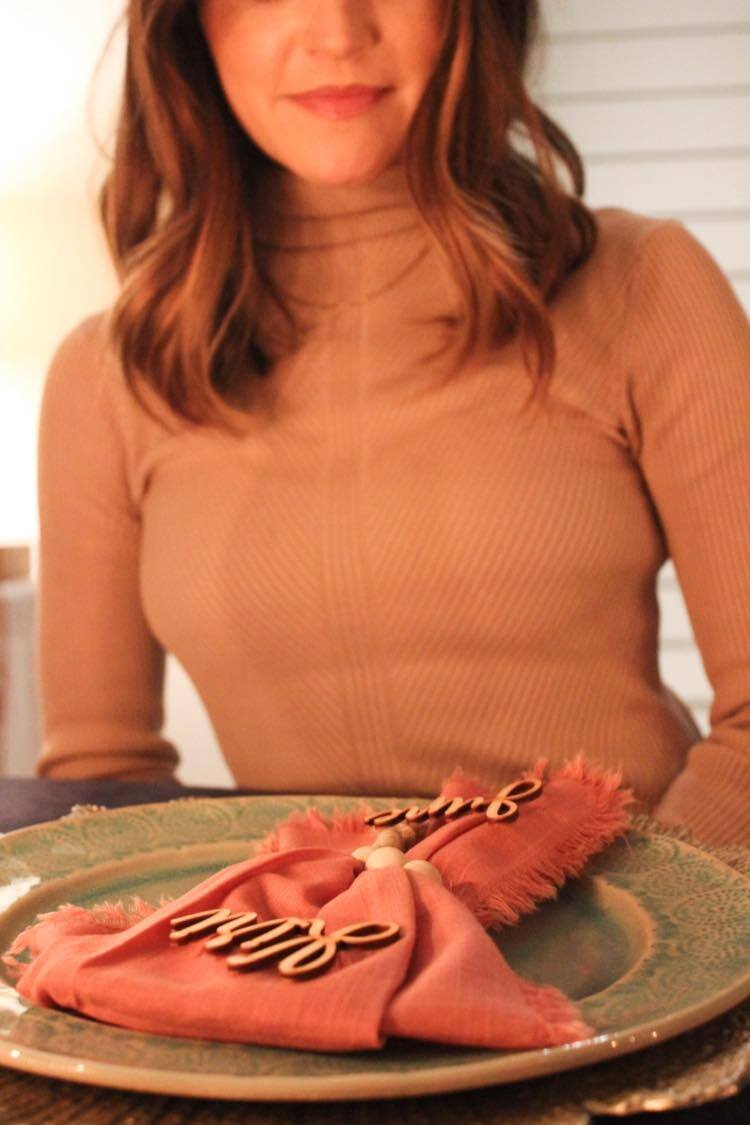
Name Plates
Please, do not let this part of the process stress you out. The most important thing is to have fun with setting the table! If you picked a theme that you love, that should be easy. Hence why we said to go with something you have already. One fun touch, is to have something personalized for each person. This could serve as their name plates. One year, each person went home with a wine glass with their name on it. The next, they each got a personalized succulent. This is just another way to spoil your friends and show them how grateful you are for them!
Step 6
Enjoy the Event
Once you have set up everything and the guests begin to show up, it is time to kick back and enjoy some quality time (and face stuffing) with your friends! We usually suggest some type of activity, game, or gift exchange for everyone to bond over at some point in the night!
Included above are some pictures of this year’s Friendsgiving celebration that we put together. Hope this helps spark some type of inspiration for you! And if you are wondering if you should throw a Friendsgiving Feast, the answer is YES-- it’s always a good idea to celebrate with your friends because life is short! If you have any questions about anything you read here or if you want us to be a part of your next celebration, please feel free to reach out!